
Record, View And Save A Sample
- Last Published Date: July 14, 2021
Recording a Sample
NOTE: Ensure Stethee Pro is paired and connected to your mobile device. The LED Ring on
Stethee Pro should be flashing BLUE. (see Pairing Stethee Pro to a Mobile Device )
Launch and log in to Stethee Pro App. Position Stethee Pro on the body location you wish to
auscultate. Stethee Pro can be used on various locations and orientations on the chest,
abdomen and other body parts.
NOTE: Standard procedures for auscultation should be followed including background noise
reduction and optimal patient positioning. When recording for the first time, Stethee Pro
Mobile App will request permission to access the mobile device’s microphone. You must agree
to this request for Stethee Pro Mobile App to work correctly.
Tap the circular red record button on the Stethee Pro Main Screen. The record button will
switch between a record and stop button once recording has started.
NOTE: There is no need to push and hold down the Control Button on Stethee Pro during
recording. The record button on Stethee Pro App acts as a remote-control that
automatically triggers recording on the device.
Stethee Pro App Mobile will start recording for 20 seconds. However, a minimum of 5 seconds of heart sounds are required for the real time analysis features. The captured sound sample is represented as a phonocardiograph (PCG).
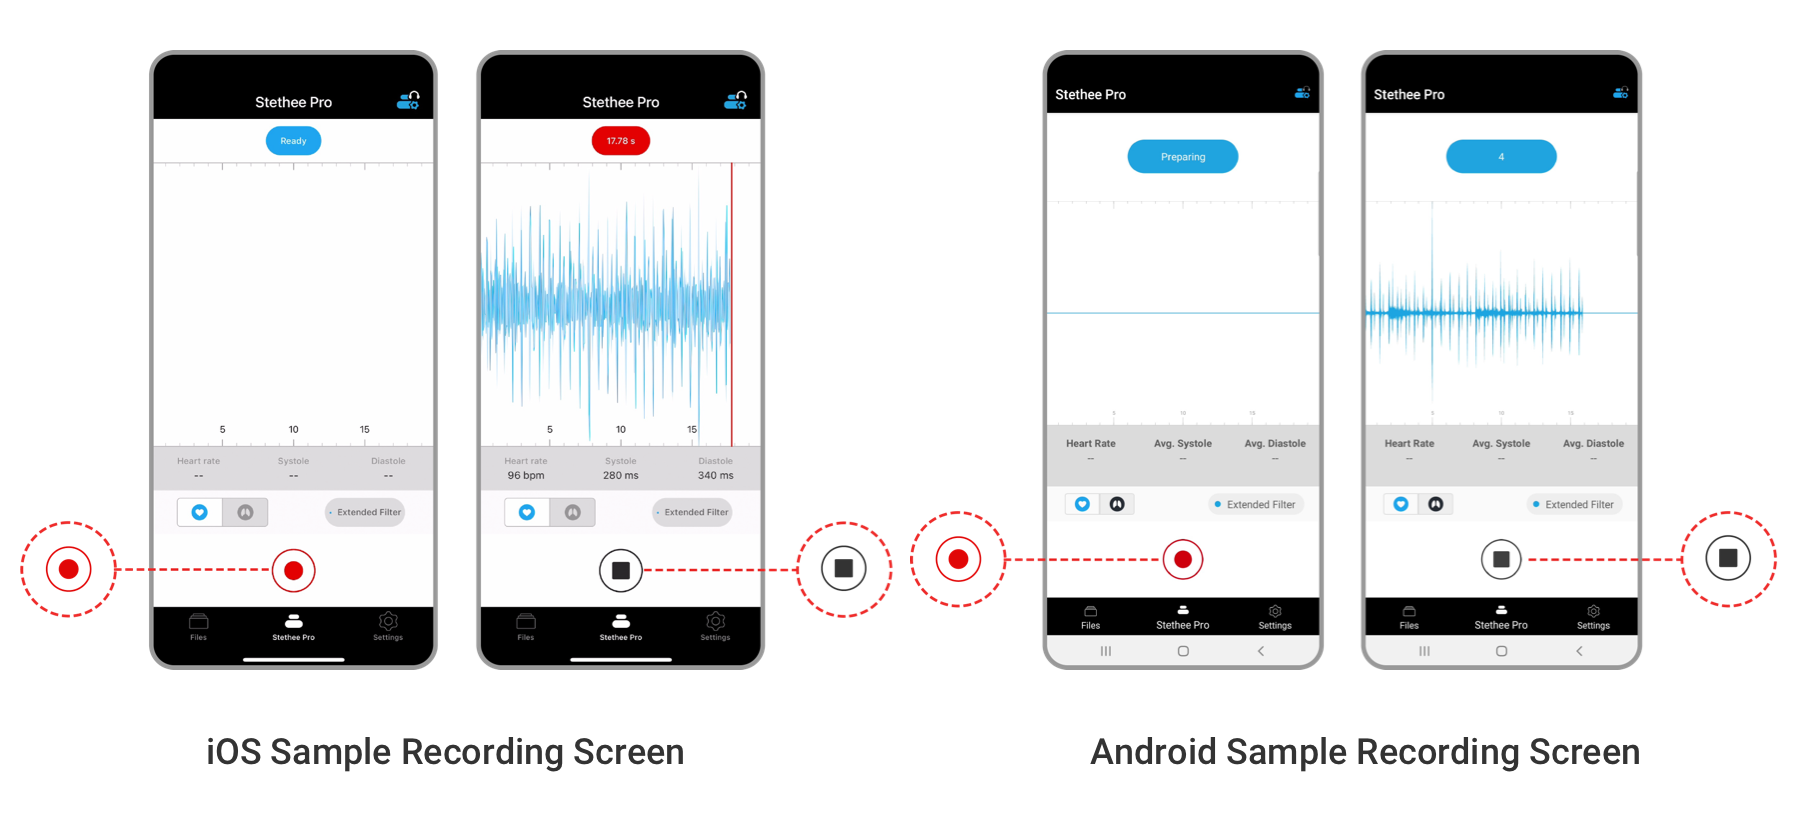
NOTE: Stethee Pro Mobile App detects and displays an acoustic-based heart rate when presented with consistent heart sounds (heart rate variation <10%). It takes a minimum of five seconds to compute the initial heart rate and Stethee Pro Mobile App performs continuous real-time updates after each heartbeat. The average heart rate from the audio sample is then stored with the phonocardiograph and spectrogram when the sample is saved.
Stethee Pro Mobile App detects and displays an acoustic-based respiration rate from 6-50 breaths/min by identifying exhalation sounds.
Viewing a Sample
Once you have captured the sample, it can be viewed with the following four screens.
| Number | Screen | Description |
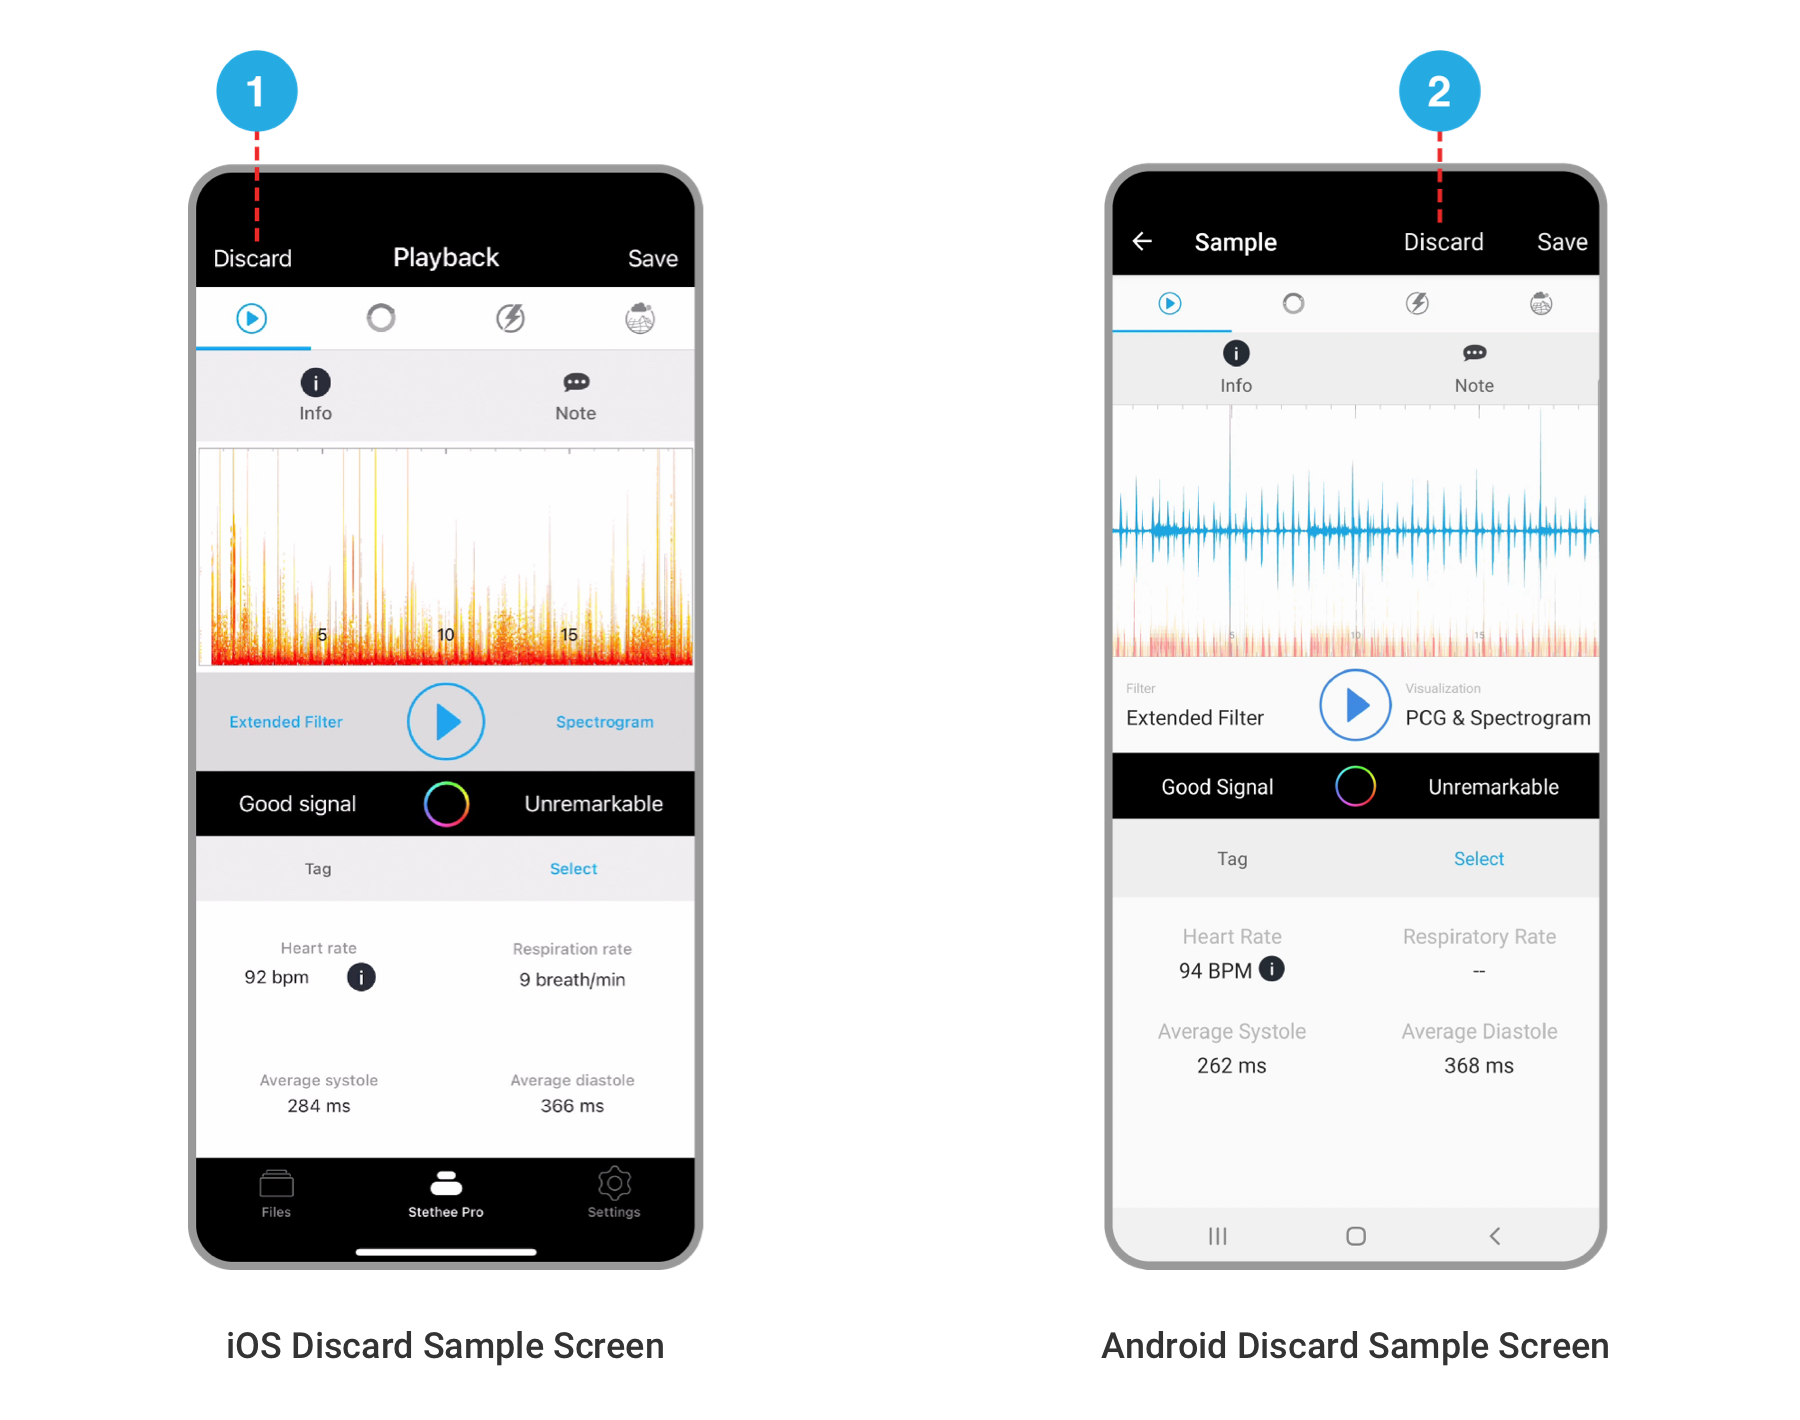
| 1 | Playback | Allows playback of the sample. You can also toggle between a phonocardiograph (PCG) or Spectrogram analysis of the sample. You may create notes, tag the sample, select body sound location and rename the sample through the info section on this screen. |
| 2 | Aida Cycle | Presents the PCG in a unique and easy to understand cardiac cycle view. |
| 3 | Aida Energy | Presents the relative energy of the first heart sound (S1) and the second heart sound (S2) from the PCG. |
| 4 | Aida Enviro | Displays information relating to the geo-location and environmental conditions where and when the sample was captured. Data displayed on this page may vary according to local regional geolocation and environmental availability. |

NOTE: For heart rates outside a range of 30-200 bpm, text stating “Opinion Required” will be displayed. If the heart rate changes from consistent to inconsistent (heart rate variation >10%) or if there is excessive ambient noise, patient movement during auscultation, the heart rate display will also indicate “—”.
NOTE: For respiration rates outside the range of 6-50 breaths/min, or if there are no exhalation sounds detected, the respiration rate display will indicate “—”.
Discard a Sample
If you want to “discard” the sample, you will be prompted to confirm this action because discarded samples cannot be retrieved.
Within iOS the discard button is located on the left (1) and within Android the discard button is located on the right (2).
Saving a Sample
If you want to “save” the sample, you will be displayed with the following screen. You can save the sample to:

A screen will be displayed confirming the sample has been saved.