Stethee Pro Mobile App Patient Files Screen
- Last Published Date: July 14, 2021
The Stethee Pro Mobile App files screen allows you to manage your patients and samples.
The Patients Files screen contains tabs for My Patients, Quick Saves, Shared Patients, and the ability to create a new patient.
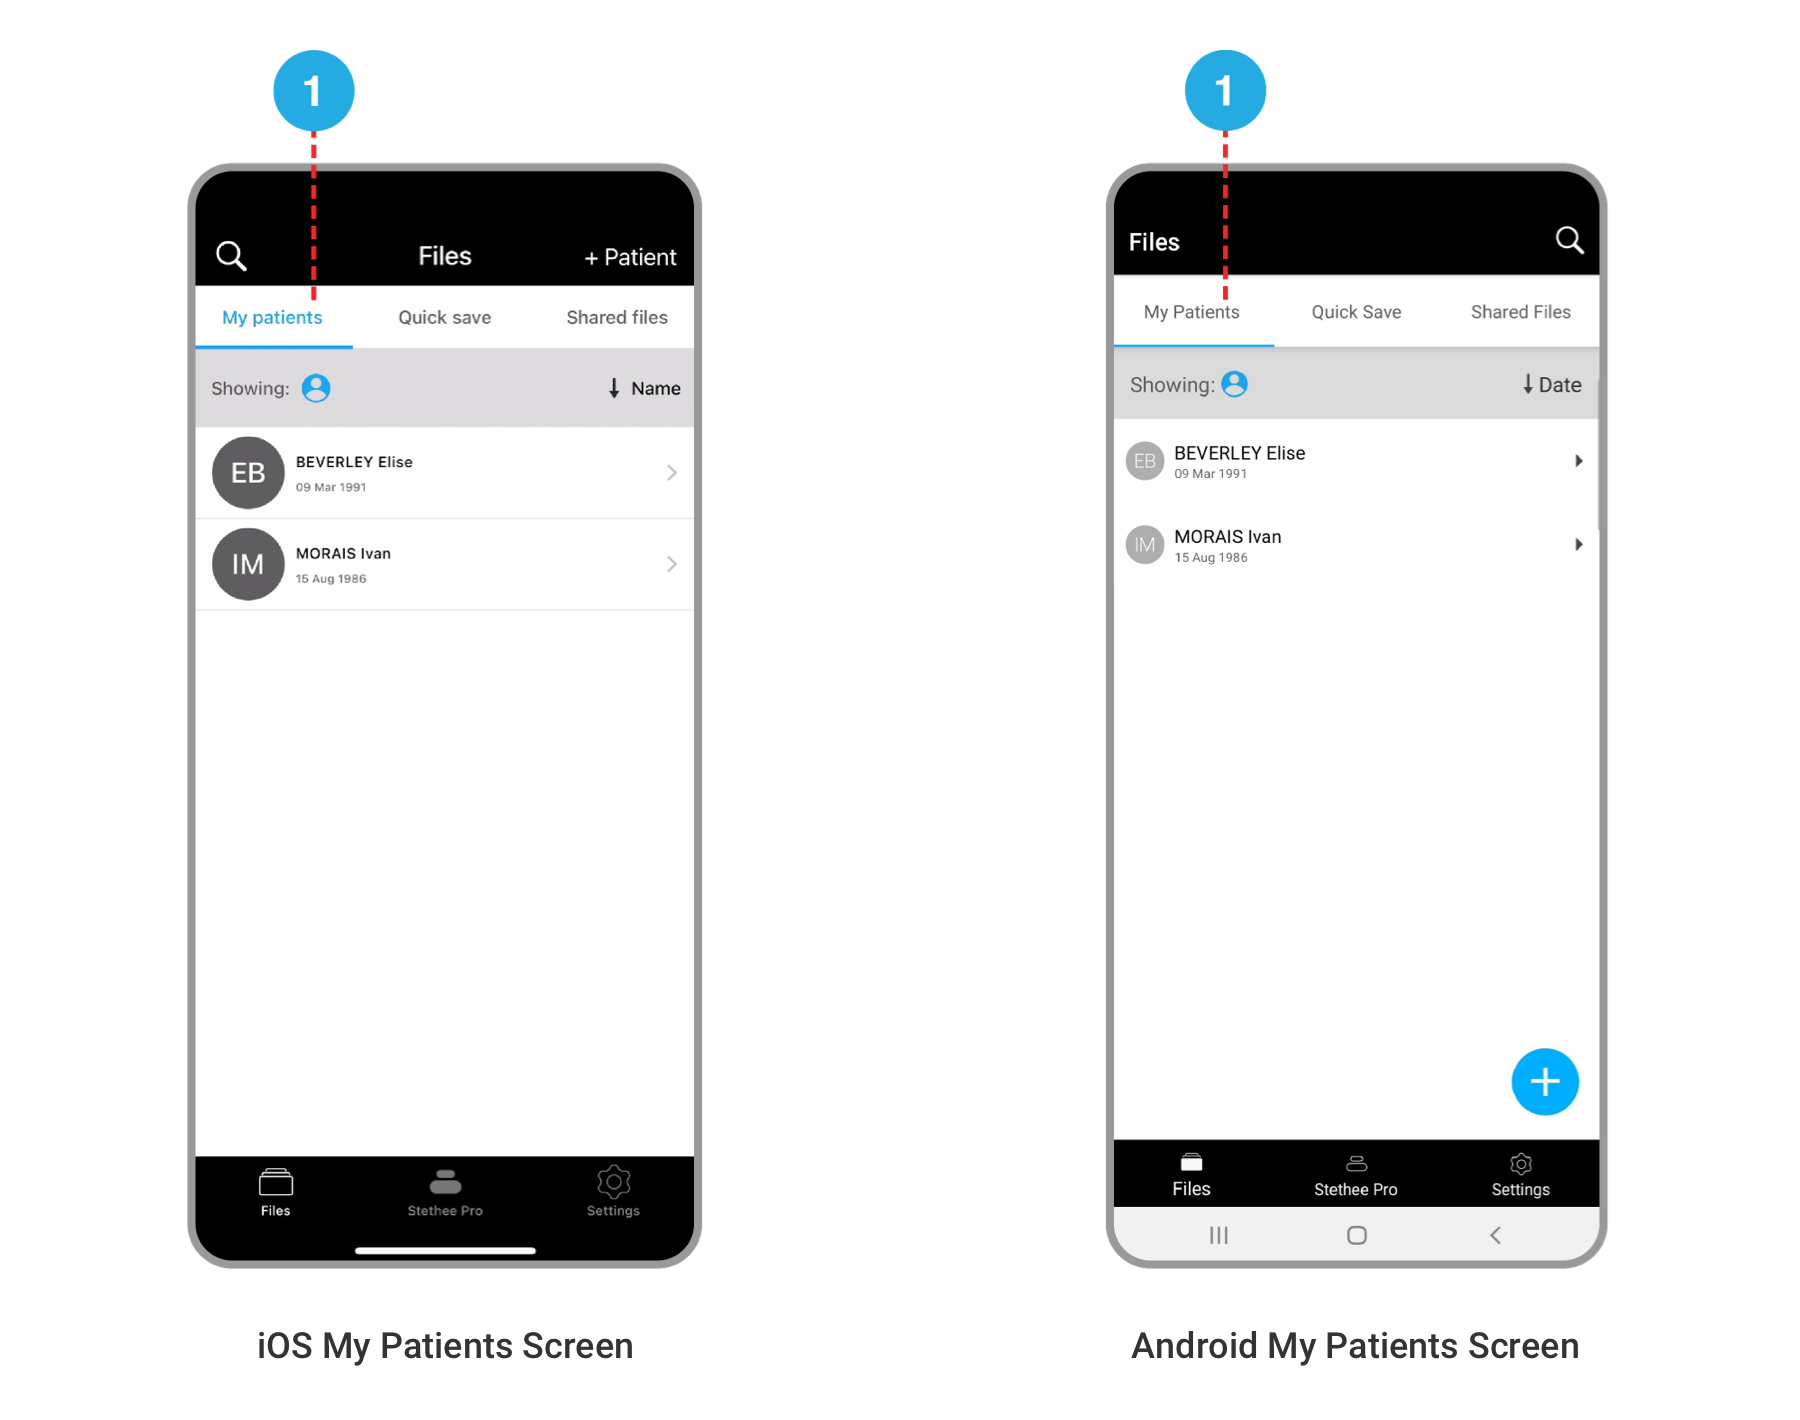
1. My Patients contains a list of patients that you have created. Select a patient from My Patients tab to display a list of all recordings associated with the patient. These can be sorted by date, time or alphabetically. From this page, you may also access previously saved and assigned recordings or add a new recording to a patient’s files.
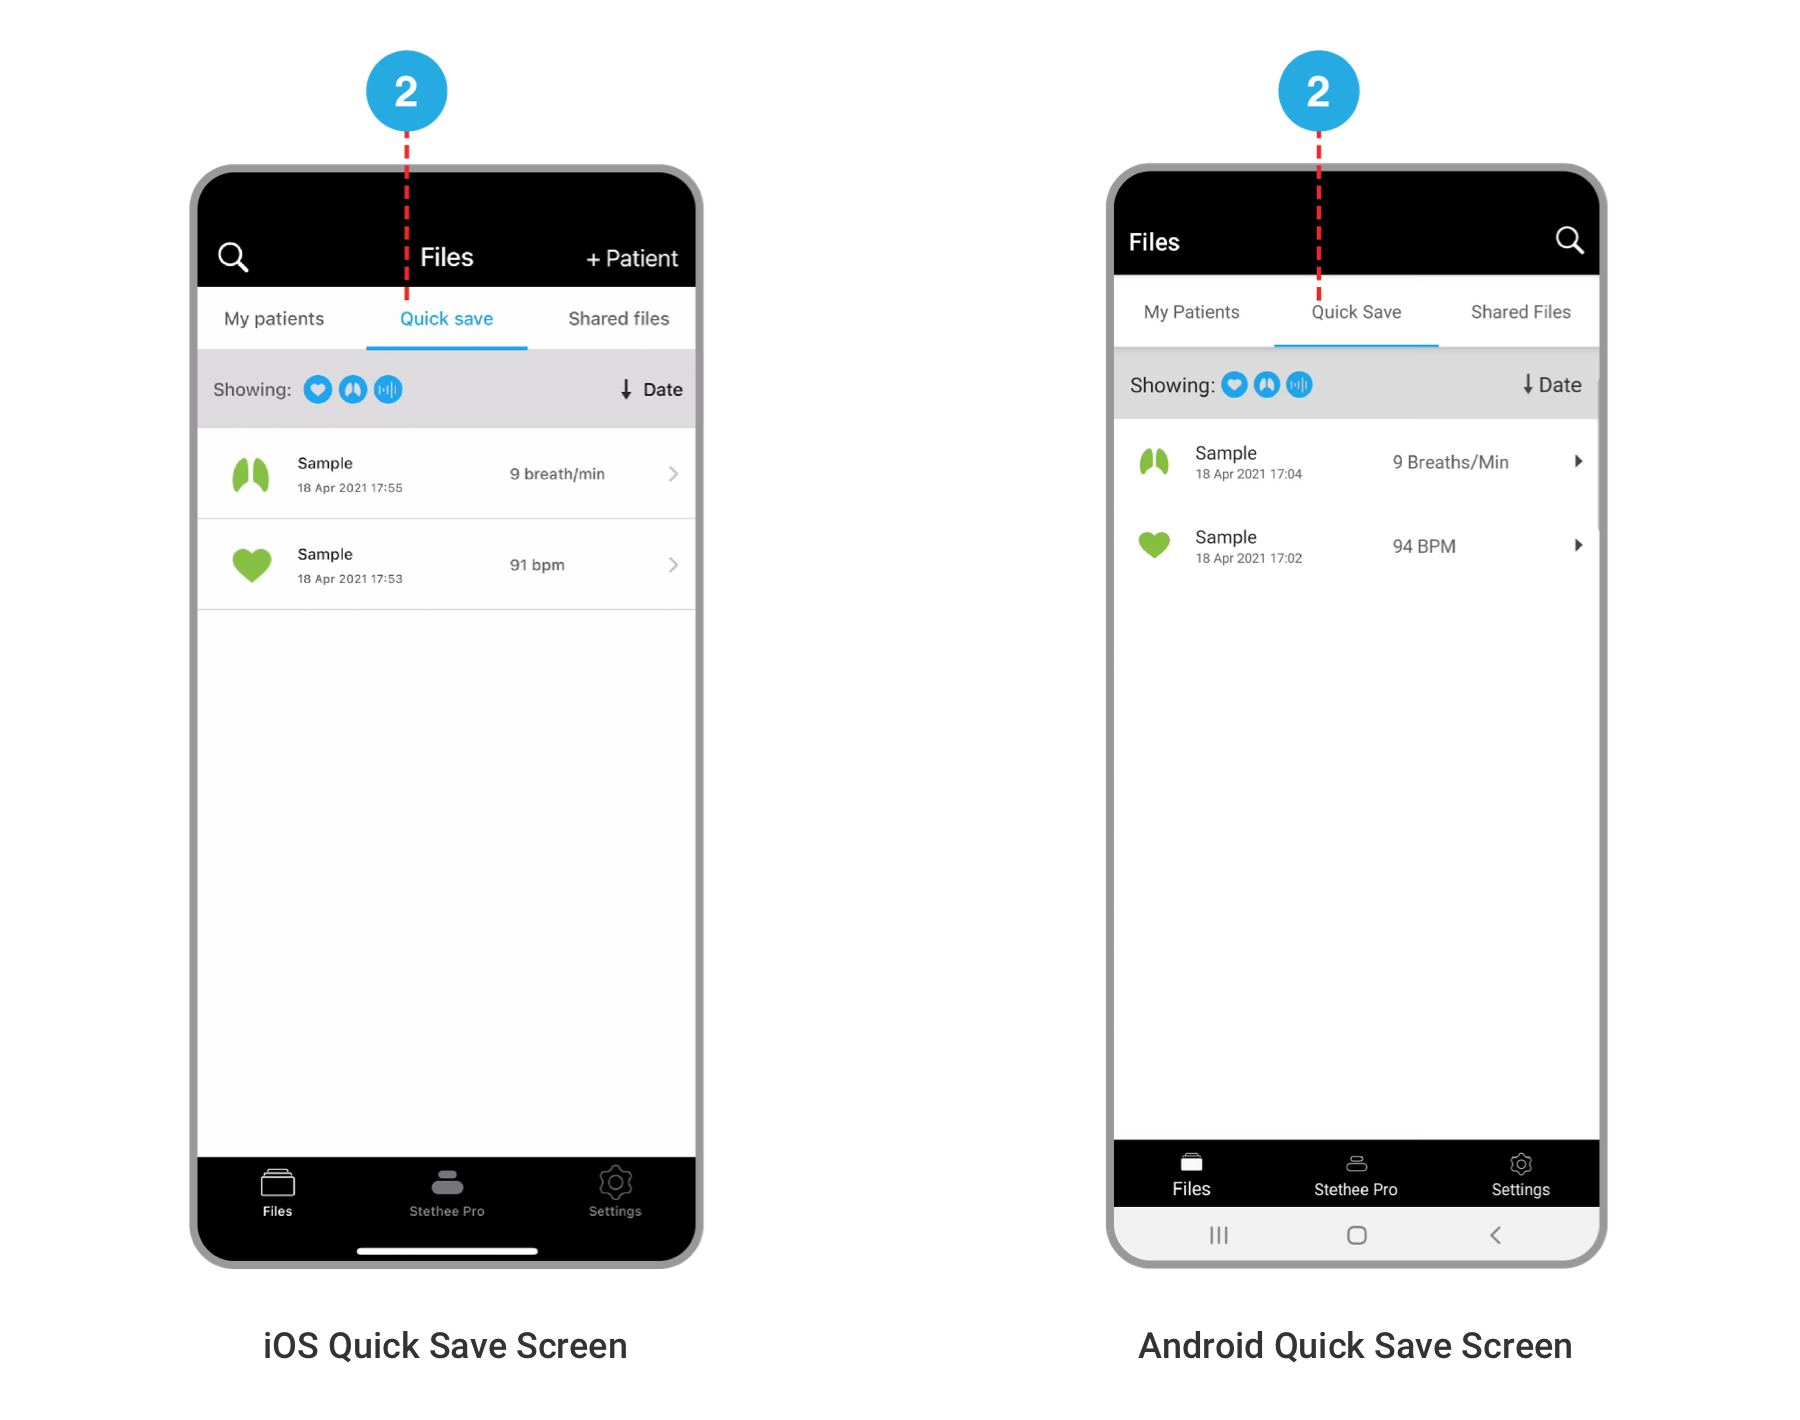
2. Quick Save is a folder where samples can be stored after saving during quick examinations. They can be assigned to a patient at a later time.
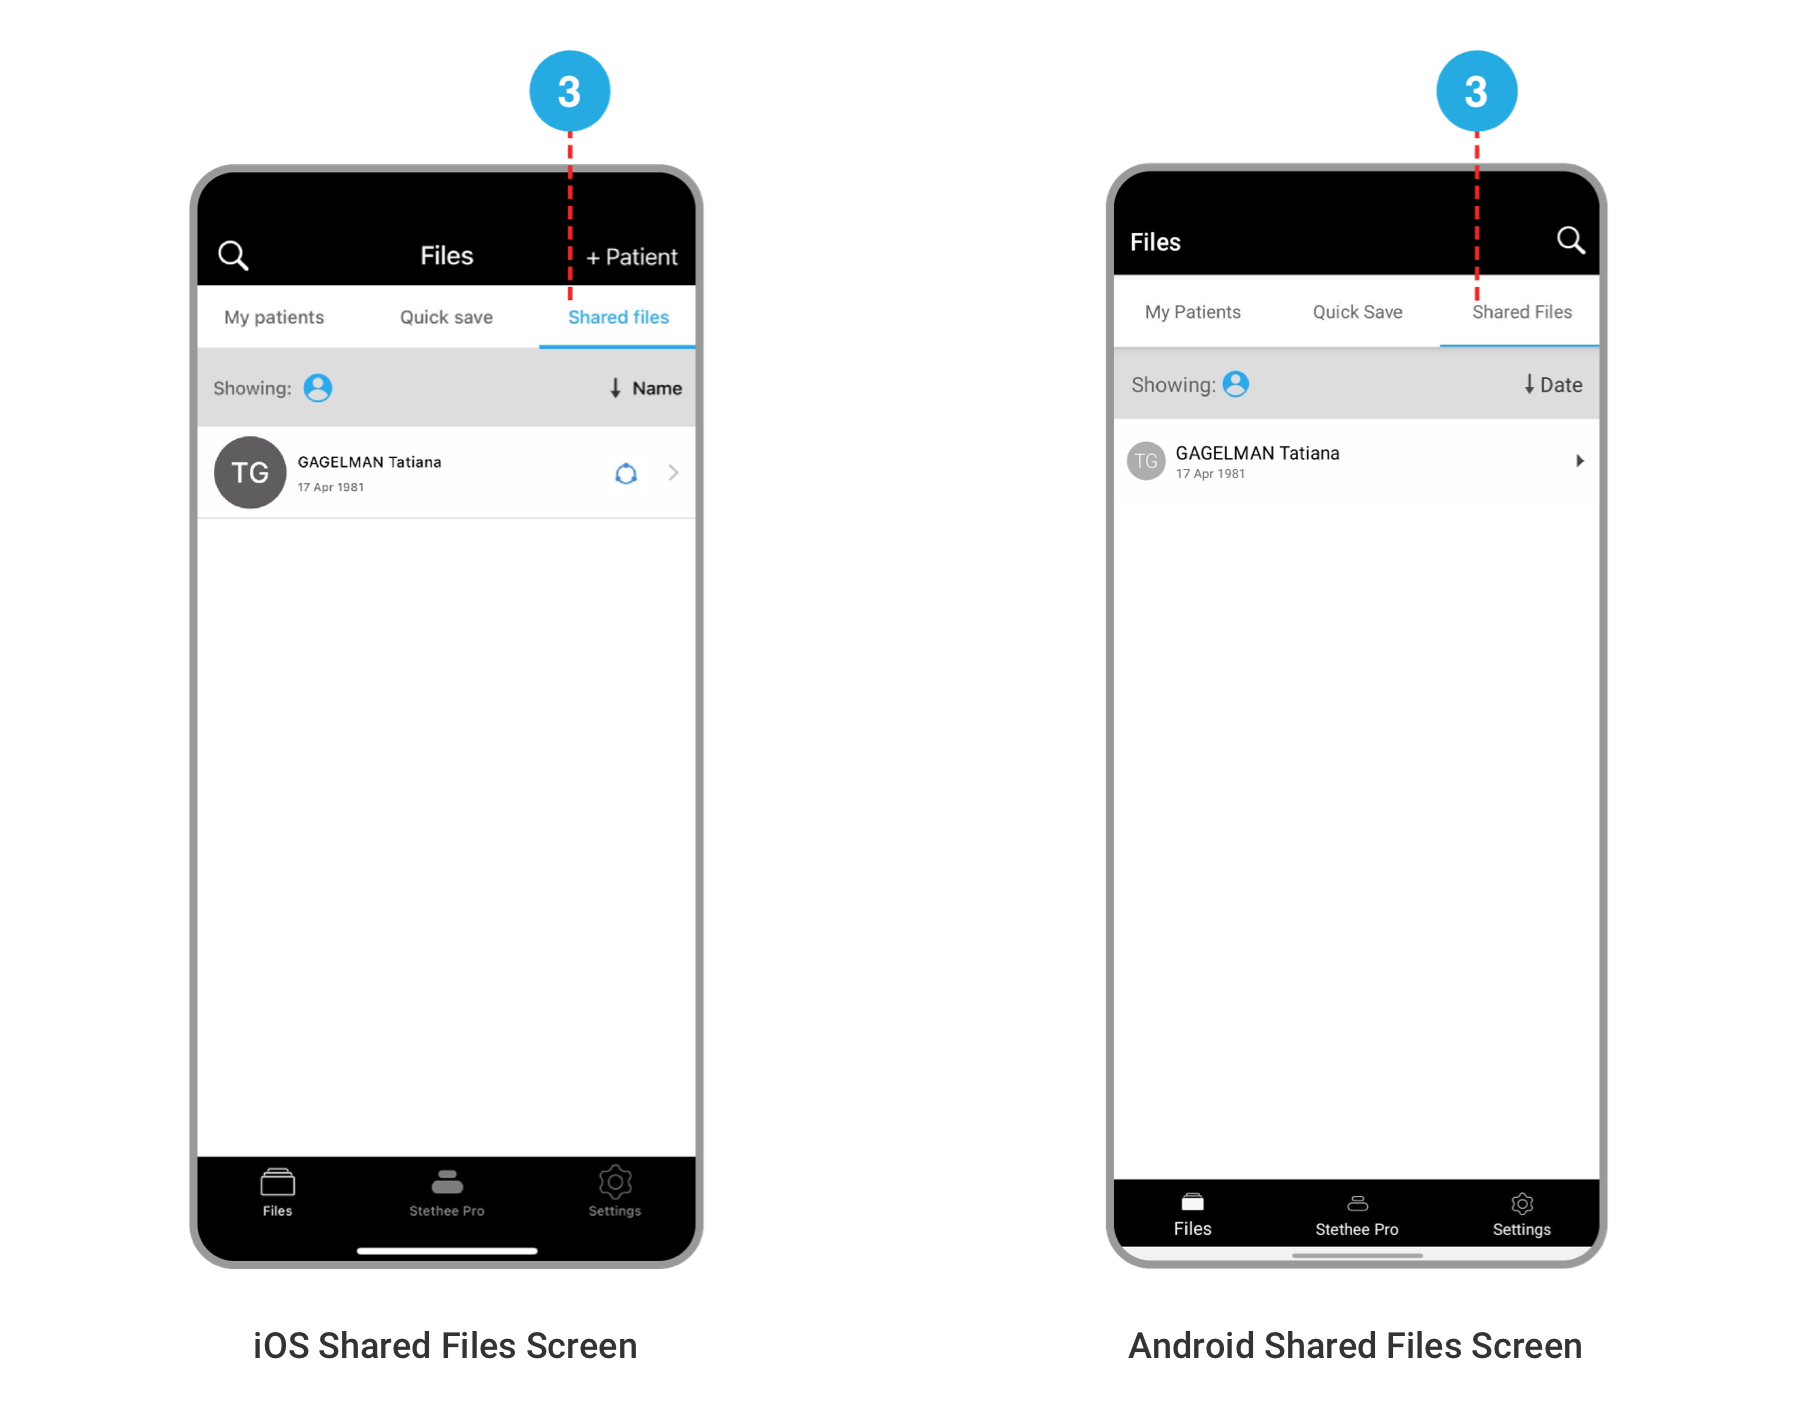
3. Shared Files tab contains patient files that have been shared with you by other Stethee Pro users.
4. + Patient (iOS) or + Icon (Android) enables you to create a profile for a new patient. An email, First Name, Last Name, Date of Birth and Gender are required fields for a patient to be saved.

“My Patients” Files
My Patients tab stores all your patient files. Patient files can be sorted by date, time or name.
“Quick Save” Files
Quick Save tab stores all the “Quick Save” samples.
If you have no samples, “Quick Save” files tab will be empty.
“Shared Files”
Shared Files tab will show patient files shared with you. You can access these files to view all the saved samples. The following conditions apply when sharing patient data:
- Sharing a patient file first requires consent from the patient. Authorization from the patient is given by email.
- Patient files shared with you will be shown in “Shared Files”.
- All samples of shared patient are viewable.
- Deleting a shared patient file will rescind your access to the patient file.
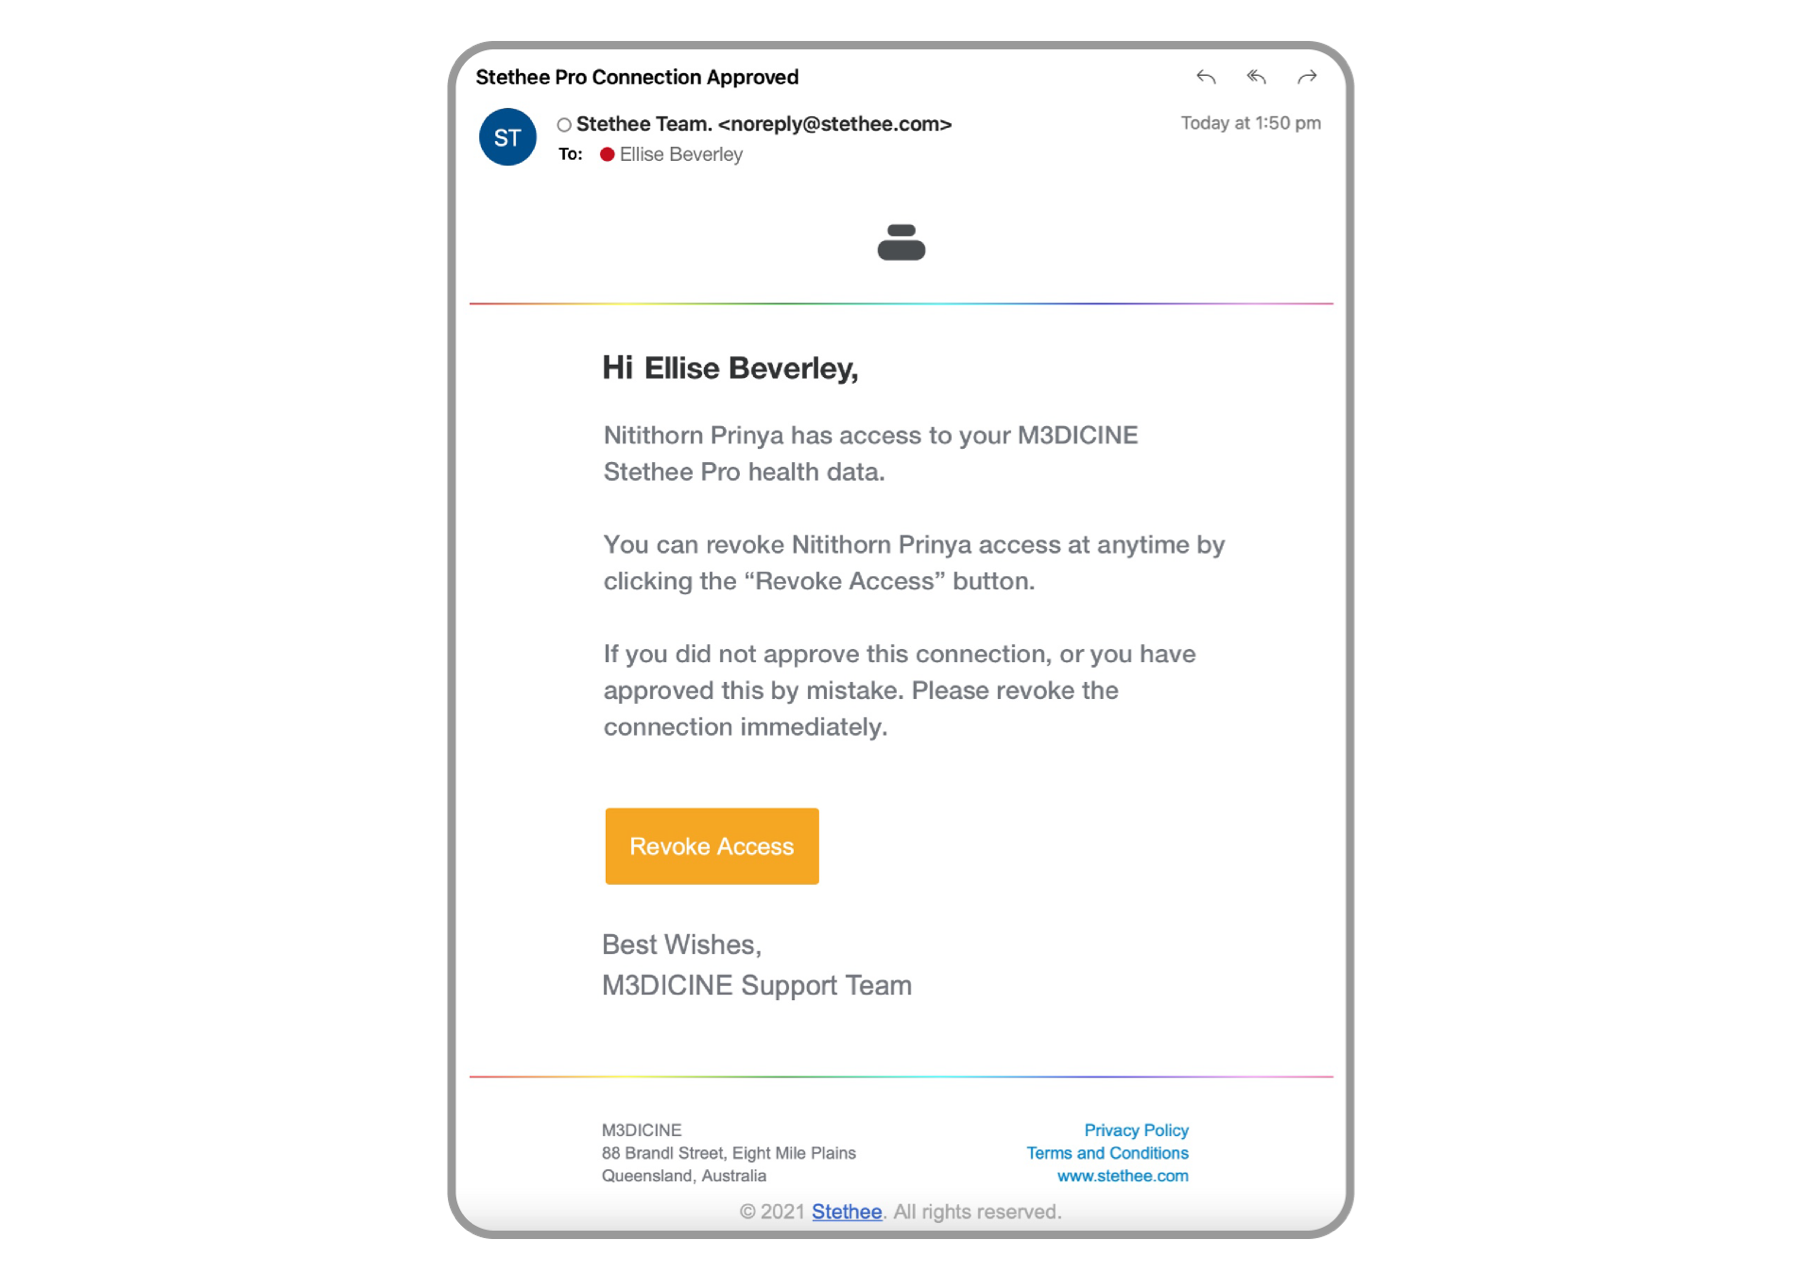
- A patient can revoke shared access to their files at any time via the revoke access email.
New Patients Screen
To add a new patient, tap on the “+ Patient” (iOS) and “+” circle (Android) and fill in the required information.

The patient will need to provide consent via an email approval process before you can manage their profile and associated data.
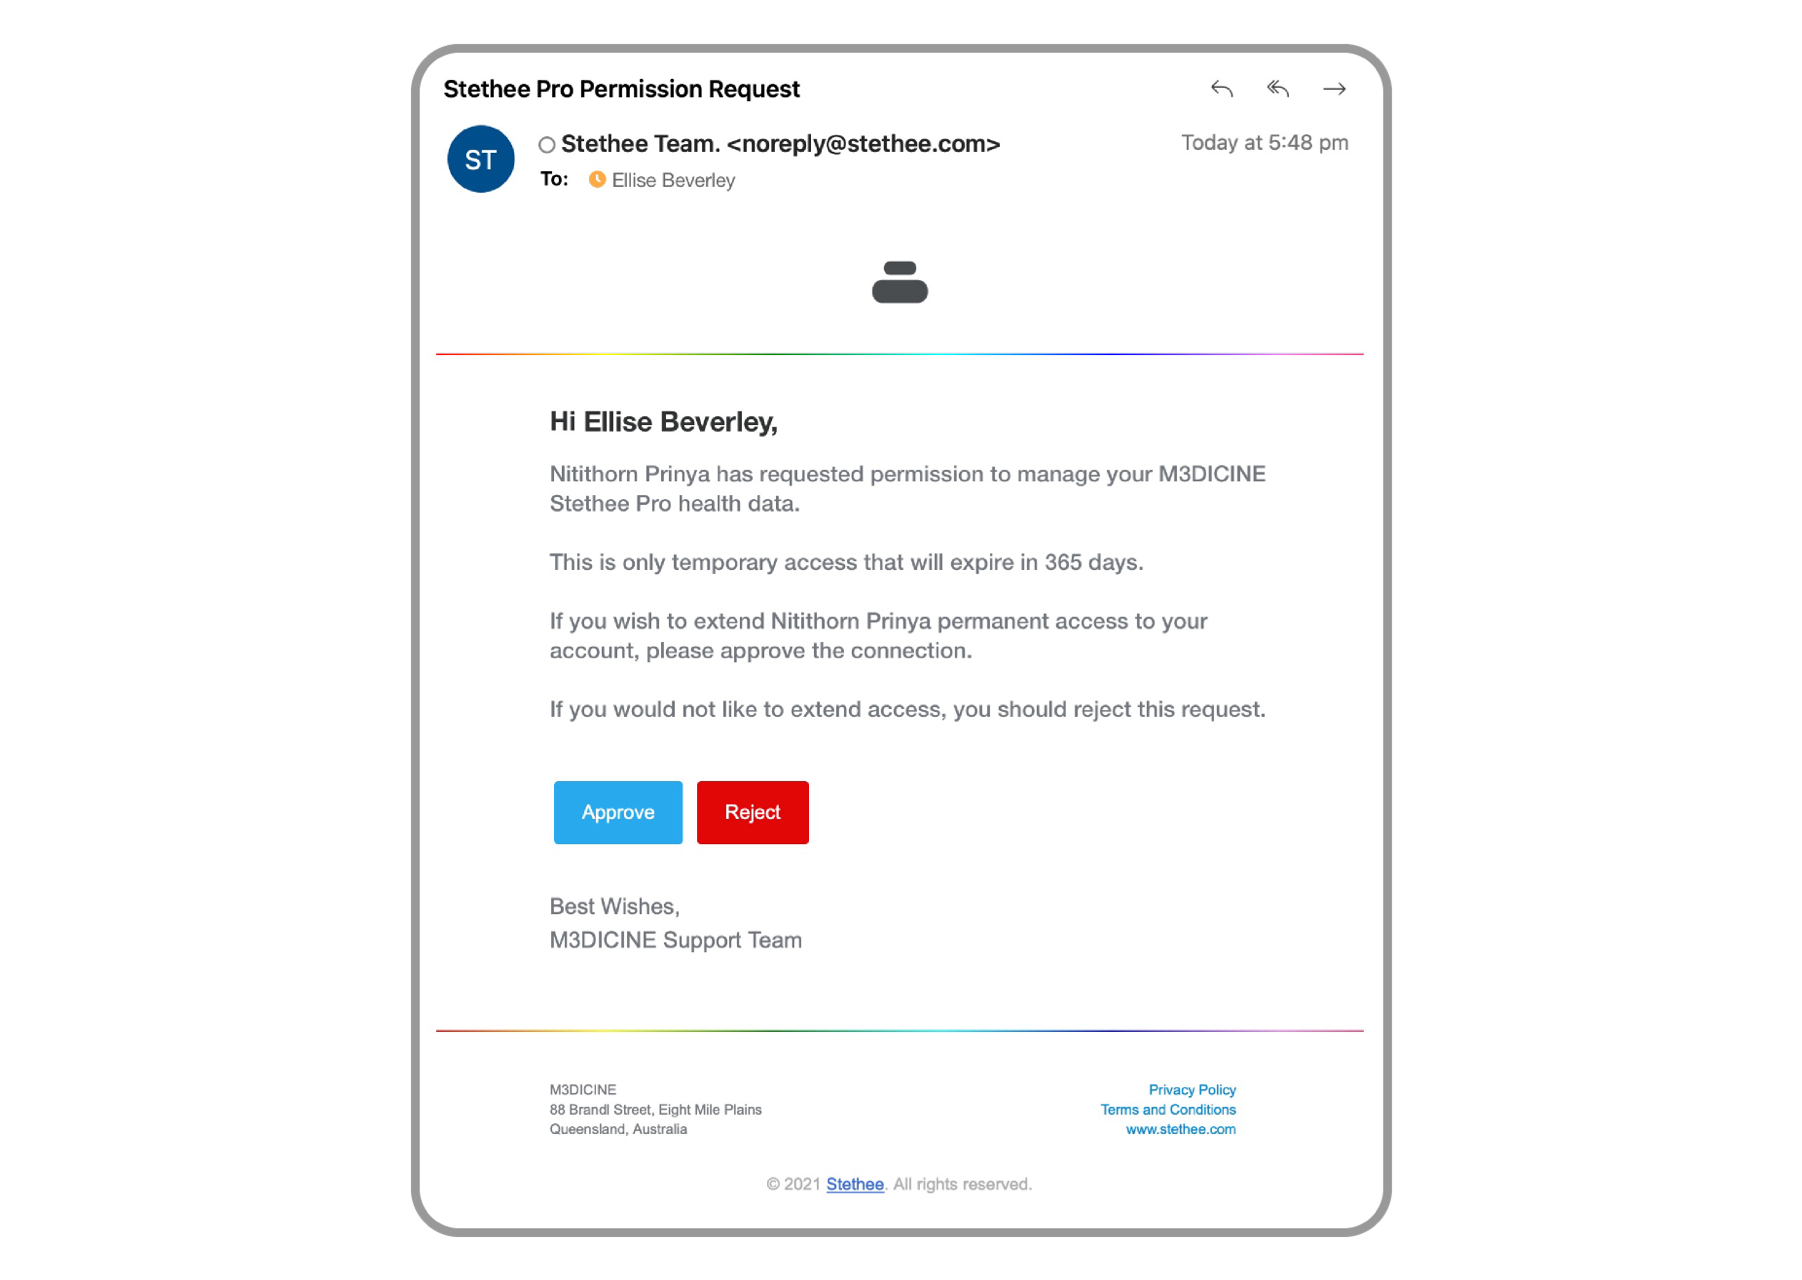
After the approval has been given by the patient, they will then be sent a new email which can revoke the assigned access.